- Introduction: What Does "Cinematic" Actually Mean?
- Part 1: Core Camera Settings for Videography
- Part 2: Advanced Picture & Post-Production Settings
- Part 3: Cinematic Camera Movements
- Part 4: Frequently Asked Questions (FAQ)
- Start Your Journey at ME Studio KL
- Professional Camera Videography Foundations & Video Editing Introductory Course (ME-CVVC-2)
Introduction: What Does “Cinematic” Actually Mean?
In today’s digital landscape, whether you are using a high-end mirrorless camera or a flagship smartphone, every creator wants to know how to shoot professional cinematic video. However, a true “cinematic look” is not just about slapping on a moody filter or adding black letterbox bars to your footage.
It is built on two non-negotiable foundations: precise camera settings for videography and purposeful camera movements. When your exposure is locked, your motion blur feels natural, and every camera move serves the story, your footage instantly elevates from a casual home video to a professional production.
Part 1: Core Camera Settings for Videography
To capture professional-grade footage, you first need to take full control of your camera. Switch your dial to “Manual Mode” (M) and master these four pillars:
Choosing the Right Frame Rate (FPS)
Frame rate dictates the smoothness and overall texture of your video. For a cinematic feel, you must choose your FPS intentionally:
- 24fps (The Cinema Standard): This is the gold standard for movies. Human eyes are accustomed to watching 24fps in theaters, which provides a slight, dreamy motion blur that feels inherently like a “story.”
- 25fps and 30fps: 25fps is the broadcast standard in PAL regions, while 30fps (or 29.97fps) is the standard for NTSC regions. If you are shooting a standard vlog or live broadcast, 30fps is highly practical.
- 60fps or 120fps (Slow Motion): High frame rates exist specifically for post-production slow motion. Shooting at 60fps and playing it back on a 24fps timeline creates buttery-smooth, epic slow-motion sequences that dramatically heighten emotional tension.
The 180-Degree Shutter Rule & Shutter Speed
In videography, shutter speed operates very differently than in photography. This is the most common beginner mistake.
- The 180-Degree Rule: To achieve the most natural “motion blur,” your shutter speed must be exactly double your frame rate.
- Practical Application: If you shoot at 24fps, lock your shutter speed at 1/50th of a second. If you shoot at 60fps for slow motion, your shutter speed should be 1/120th of a second.
- Why it matters: If your shutter speed is too fast (e.g., 1/500s), moving objects will look hyper-sharp and jittery (like an action sports broadcast). If it’s too slow, the footage becomes overly blurry and unusable.
Aperture, Depth of Field, and ND Filters
Your aperture controls how much light hits the sensor and dictates your Depth of Field (DoF).
- Shallow Depth of Field: Using a wide aperture (like f/1.4, f/1.8, or f/2.8) separates your subject from the background, creating that coveted “bokeh” effect. This naturally guides the viewer’s eye to the most important part of the frame.
- The Necessity of ND Filters: If you are shooting outdoors in bright daylight, maintaining a 1/50s shutter speed and an f/1.8 aperture will guarantee a blown-out, overexposed image. To fix this, you need a Variable ND (Neutral Density) filter. Think of it as sunglasses for your camera lens—it restricts light so you can maintain cinematic settings even at noon.
ISO and Noise Control
ISO measures your camera’s sensitivity to light. In video, digital noise is much harder to remove than in photography.
- Stick to Native ISO: Always keep your ISO as low as possible, ideally at your camera’s “Native ISO” (usually between 100 and 800). This ensures maximum dynamic range and pure, noise-free footage.
- Low Light Solutions: Instead of cranking up your ISO in dark environments, switch to a fast prime lens (like a 50mm f/1.4) to let in more physical light.
Part 2: Advanced Picture & Post-Production Settings
Why You Must Lock Exposure and White Balance
Auto-exposure and auto-white balance will instantly ruin a cinematic shot.
- Lock Exposure: If you let the camera decide, your brightness will fluctuate distracting as you pan across a room. Set your aperture, shutter, and ISO manually, and leave them there.
- Manual White Balance: Auto White Balance (AWB) shifts colors mid-shot as lighting changes. Manually dialing in your Kelvin temperature ensures consistent skin tones, which is crucial when you move into post-production.
Picture Profiles: Neutral vs. Log Formats
If your goal is to eventually master Premiere Pro basic video editing and color grading, you need to shoot flat.
- Neutral Profiles: If your camera doesn’t have Log formats, set your picture profile to “Neutral” and turn down the contrast, sharpness, and saturation.
- Log Profiles (S-Log, C-Log): Professional cameras offer Log profiles. The raw footage will look grey and washed out, but it retains the maximum amount of data in the highlights and shadows, giving you total freedom to craft a cinematic color grade later.
Mastering Manual Focus
While modern autofocus is incredible, Manual Focus is still king for narrative storytelling.
- Avoid the “Hunt”: Using continuous autofocus in a cluttered scene often results in the lens “hunting” (pulsing back and forth to find the subject), which immediately breaks viewer immersion.
- The Rack Focus: A classic cinematic technique where you smoothly shift focus from a subject in the foreground to a subject in the background. It is a powerful way to visually direct the audience’s attention without cutting the camera.
Part 3: Cinematic Camera Movements
Perfect settings are just the canvas; camera movement is the paint. Every time you move the camera, it must serve a narrative purpose. Never move just for the sake of moving.
The Static Shot: Letting the Scene Breathe
Sometimes, the best movement is no movement at all. Locking your camera on a sturdy tripod allows the actors’ performances and the set design to take center stage. It is perfect for delivering dialogue or establishing a sense of calm and isolation.
Pans and Tilts: Guiding the Viewer’s Eye
- Pan: Swiveling the camera horizontally left or right from a fixed position. Pans are great for following a walking character or revealing the massive scale of a landscape. A “Whip Pan” is a rapid, blurry pan often used as an energetic transition between scenes.
- Tilt: Moving the camera vertically up or down. Tilting up can make a character look imposing or heroic, while tilting down can make them appear vulnerable or small.
Push-in and Pull-out: Emotional Dynamics
These are heavily psychological camera moves:
- Push-in (Dolly-in): Physically moving the camera closer to the subject. This draws the audience into the character’s mind, amplifying tension, intimacy, or the realization of a crucial piece of information.
- Pull-out (Dolly-out): Smoothly moving away from the subject. Emotionally, this technique is used to visually isolate a character, highlight their loneliness, or serve as a classic closing shot for a scene.
Tracking Shots: Moving with the Subject
Moving parallel to your subject. Leading the subject (walking backwards) forces the audience to anticipate what the character is reacting to. Following from behind creates a sense of mystery.
Gimbal vs. Handheld Techniques
- Handheld: Introducing slight camera shake creates a gritty, documentary-style realism. It’s highly effective for chaotic, high-energy, or anxiety-inducing scenes.
- Gimbals: For buttery-smooth, floating footage, a 3-axis gimbal is essential. However, relying on a gimbal isn’t enough; operators must master the “Ninja Walk” (bending the knees and walking heel-to-toe) to prevent vertical bouncing.
Part 4: Frequently Asked Questions (FAQ)
Q1: Why does my video look like a cheap soap opera instead of a movie?
A: This is known as the “soap opera effect.” It usually happens when you shoot at a high frame rate (like 60fps) and play it back in real-time with a fast shutter speed. To fix this, change your settings to 24fps and lock your shutter speed at 1/50s.
Q2: How do I keep my background blurry when shooting outdoors in the sun?
A: You need a Variable ND filter. Without it, you would have to close your aperture (losing your blurry background) or increase your shutter speed (losing your cinematic motion blur) to prevent the sun from overexposing your shot.
Q3: Should I use autofocus when shooting a short film?
A: For professional narrative work, manual focus is strongly recommended. Autofocus can be unpredictable and may shift to the wrong subject mid-take. Learning to pull focus manually gives you 100% control over the visual storytelling.
Q4: I’m just starting out. Where should I begin practicing?
A: Start by mastering the static shot and the basic pan. If you want to accelerate your learning curve, seeking out local, hands-on guidance—such as a videography for beginners course KL—is one of the fastest ways to understand how professional lighting, settings, and movements work together in the real world.
Start Your Journey at ME Studio KL
Join Our Upcoming Workshop: April & May 2026
Are you ready to stop “guessing” and start creating?
Join the Professional Camera Videography Foundations & Video Editing Introductory Course (ME-CVVC-2) at ME Studio.
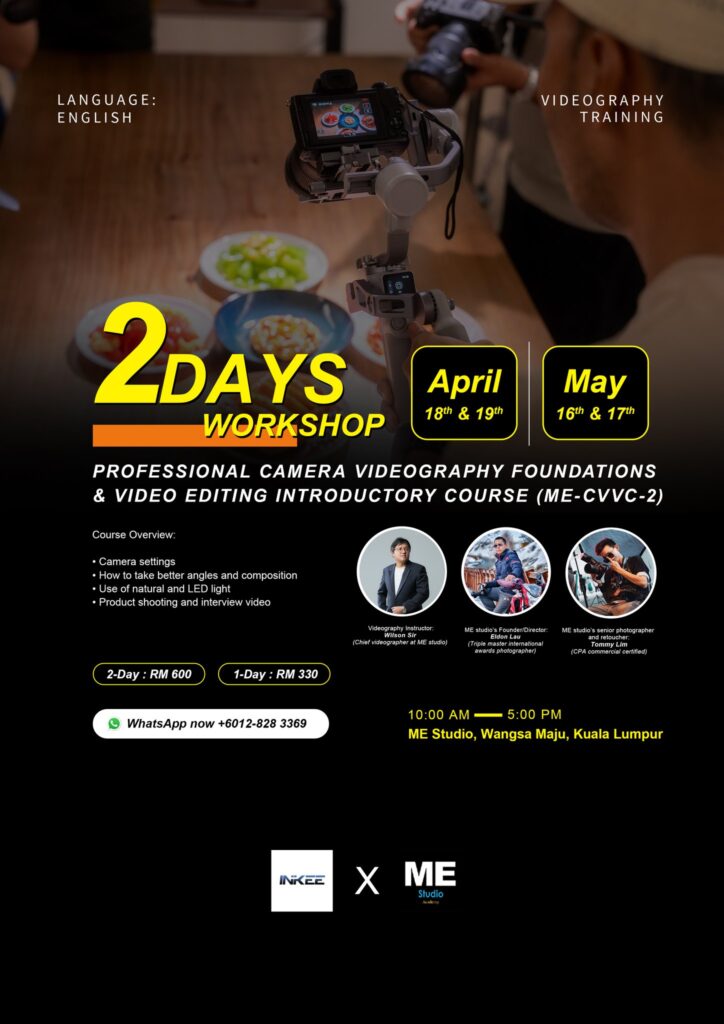
Professional Camera Videography Foundations & Video Editing Introductory Course (ME-CVVC-2)
Workshop Dates:
- April Intake: 18th & 19th (10:00 AM — 5:00 PM)
- May Intake: 16th & 17th (10:00 AM — 5:00 PM)
Course Fees:
- 2-Day Full Experience: RM 600
- 1-Day Basic Pass: RM 330
Meet Your Instructors:
- Wilson Sir: Chief Videographer at ME Studio.
- Eldon Lau: ME Studio’s Founder/Director, Triple Master International Award-winning Photographer.
- Tommy Lim: Senior Photographer and Retoucher.
Check more photography courses